Use the following procedure to edit staff member information from the Staff page:
1. Select Staff from the Security section of the Setup menu.
2. Search for the staff member you want to edit.
3. Click Select next to the staff member name in the List of Staff grid. The staff member information is displayed.
4. Click Edit to modify the staff member. The Modify Staff page is displayed.
5. Modify the staff member's personal information in the fields provided.
•User: Select the staff member's User name from the drop-down list.
•*Last name: Enter the staff member's last name.
•*First name: Enter the staff member's first name.
•Position: Select the appropriate position form the drop-down list.
•Email: Enter the staff member's email address.
•Notify for work order events: Select this check box if the staff member should be notified by email when a work order status changes. The staff member's email address must be included in the Staff email to notify field for the work order.
Note: When a work order status changes, the system will send an email to all staff whose email address is listed in the Staff email to notify field and all staff linked to the facility who have the Notify for work order events check box selected and have an email address specified in the Email field in the Staff option.
•Address/City/State/Zip: Enter the staff member's address.
•Phone: Enter the phone number where the staff member can be reached.
•Allow access: Select the check box next to the options to which this staff member can have access (Work Orders, Room Inspections, Conferences). This setting will restrict which staff members will appear in various areas in the system. For example, someone who is associated with work orders but not conferences cannot be assigned to an event.
6. Click Save. The Staff successfully updated message is displayed.
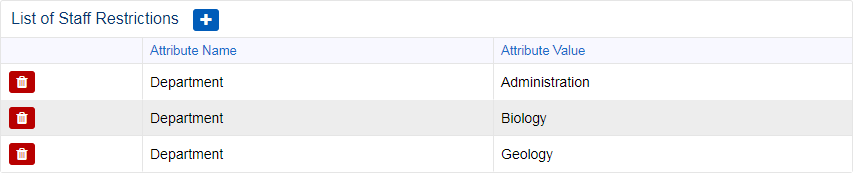
7. From the List of Staff Restrictions grid, click Add and select an attribute value from the dropdown menu. Selecting an option will restrict the ResCenter user to only allow access to data from patrons that have the same matching attribute value.
If the ResCenter user has a value in the List of Staff Restrictions, the user can only view patrons with the same defined value for the selected attribute in the Attribute to restrict access to patron system parameter. If there is no value, then the ResCenter user has access to ALL patrons. This restriction only affects Work Orders, Room Inspections, and Conferences.
Note: This field works in conjunction with the Attribute to restrict access to patron system parameter. Once an administrator selects an attribute from the Attribute to restrict access to patron setting, the administrator can set a ResCenter user's value for that same attribute via the List of Staff Restrictions setting. In this scenario, the ResCenter user can only view patrons that have the same defined value for the selected attribute in the Attribute to restrict access to patron system parameter. Also, this restriction is only for Work Orders, Room Inspections, and Conferences. For example:
If an administrator sets the Attribute to restrict access to patron attribute to Campus, and then sets ResCenter user Tom Smith's List of Staff Restrictions option to South, then Tom Smith will only have access to patrons whose Campus attribute is South.
Click Save to save the restriction, or cancel to cancel the operation.
If necessary, to remove a restriction, click Delete next to the desired restriction.
8. From the List of Staff Facilities grid, click Edit and modify the information in the fields provided.
•*Location: Click the ... button and select a location.
•*Effective Date: Click the ... button and select an effective date from the calendar.
•End Date: Click the ... button and select an end date from the calendar.
9. Click Save. The Staff successfully updated message is displayed.
10. Click Close to return to the Staff page.