 for the
desired parent facility.
for the
desired parent facility.The Copy Structure function allows an administrator to quickly create multiple facilities based on an existing facility structure. When a facility structure is copied, the new facilities will have the same base attributes and facility asset types as the original facilities, by default. However, these options can be changed during the Copy Multiple Facilities process or when editing an individual facility.
Use the following procedure to copy a facility structure from the Facilities page:
1. From the Facilities section of the Facilities menu, select Manage Facilities from the Facilities menu.
2. From the Facility Tree, click on a
facility to select the facility to view. If necessary, expand the tree by
clicking on the expand icon for the
desired parent facility.
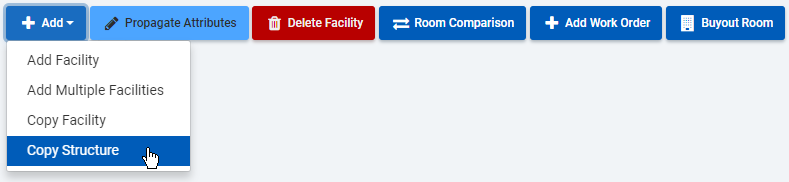
3. With a facility selected, click the Add drop-down menu, and select Copy Structure.
4. Follow each step in the copy structure wizard:
1. In Insert Facility Where menu, select where the copied facility structure should be inserted in the facility tree:
•As Top Level Facility - If this option is selected, the facilities will be added as a top level facility. Skip to step 3.
•Below Selected Facility – If this option is selected, the facilities will be added as child facilities below the facility selected in the Relative to Facility field.
•Next to Existing - If this option is selected, the facilities will be added on the same level (or next to) the facility selected in the Relative to Facility field.
2. In the Select Facility field, select the facility to use as a reference for where the new facilities will be inserted (via the Insert Facility Where option).
Enter all or part of the facility name in the field. Click Lookup to see a list of facilities matching the entered facility name. Select the desired facility.
Alternatively, click Tree to display the Facility Tree and select a facility.
3. Click Next.
1. Use the calendar menu to select the date on which the new facility structure will be added to the facility tree. The current date will be used, by default.
2. Click Next.
The Source Facilities’ Properties page displays the main settings for each facility. Each setting is read-only.
1. Review each facility to determine if any of the settings for a facility need to be changed. Refer to the Name and Facility ID to identify each facility.
2. To edit settings, select Yes in the Do you want to change? menu for each facility. The settings can then be changed in the following step.
3. Click Next.
1. Review each facility to determine if any of the settings for a facility need to be changed. The facilities that were marked as Yes in the previous step will have editable fields.
2. For each facility with editable fields, edit the following settings, as necessary:
•Name: The name of the facility.
•Facility ID: The facility’s ID.
Note: When copying a facility, each facility ID on the same level must be unique. Changing the facility at the parent level is encouraged to achieve a unique facility ID for a copied facility at the same level.
•Facility Asset Type: This value indicates the facility type associated with the facility’s asset type. Asset Types and Facility Types are defined in ResCenter’s Setup module.
•Max Legal Occupancy: For lower level facilities (such as rooms), this value indicates the total number of spaces available. This field is for information only.
•Gender: The gender of patrons that should be assigned to the facility.
•In-Service: Check this option to allow patrons to be assigned to the facility.
•Smoking Allowed: Check this option if smoking will be allowed in the facility.
3. Click Next.
1. Review each facility to edit any of the roommate or assignment level properties. The facilities that were marked as Yes in Step 3 will have editable fields.
2. For each facility with editable fields, edit the following settings, as necessary:
•Roommate Level: Check this option if the facility can contain roommates. A roommate-level facility may not be below an assignment level facility.
•Assignment Level: Defining a facility as Assignment Level allows patrons to be assigned to the exact facility.
If Assignment Level is selected, the Assignment Limit and Overflow Limit settings can be configured in the next step:
Note: A facility cannot be defined as Assignment Level if a child facility under it is marked as Assignment Level.
3. Click Next.
1. Review each facility to determine if any of the settings for a facility need to be changed. The facilities with the Assignment Level option checked in the previous step will have editable fields.
2. For each facility with editable fields, edit the following settings, as necessary:
•Assignment Limit: The Assignment Limit indicates the maximum number of patrons that should be assigned to the facility.
•Overflow Limit: The Overflow Limit indicates the number of extra patrons that could be assigned to the facility, over the Assignment Limit.
For example: If a room’s Assignment Level is 2 patrons, but the room could fit 3 patrons, enter 1 for the Overflow Limit.
3. Click Next.
The final step provides a summary of the facility structure created.
1. Review the information for each facility. If any settings need to be adjusted, click Previous to re-visit a step in the Copy Facility Structure process.
2. Edit any settings, as needed.
3. Once all settings are complete, click Finish. The facilities will be added to the Facility Tree on the Add Facility On date selected in Step 2.
4. If necessary, edit settings or propagate attributes for the facilities.