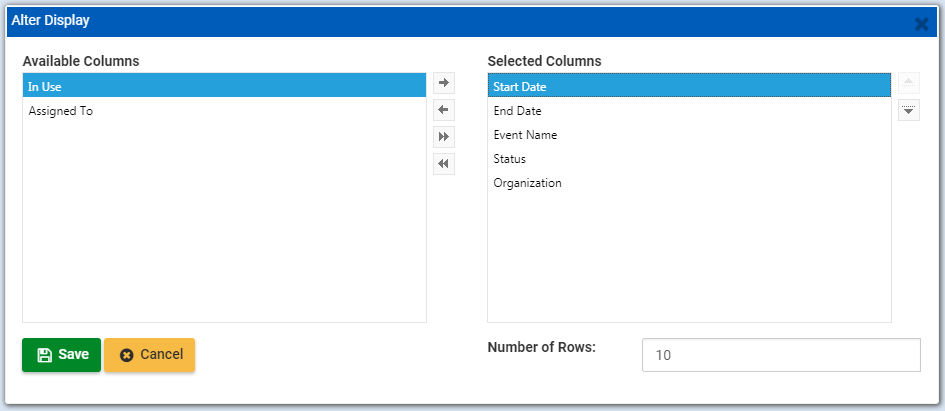
Many grids in ResCenter can be altered by adding or removing columns and changing the order of the columns. Use the following procedure to alter the display of a grid in ResCenter:
1. When viewing a grid, click Alter Display. The Alter Display dialog box is displayed.
2. Use the following controls to move columns from the Available Columns window (columns available but not currently in the grid) to the Selected Columns window (columns currently displayed in the grid) and vice-versa:
|
Button |
Description |
|
Add Selected |
Click this button to move any selected columns from the Available Columns window to the Selected Columns window. |
|
Remove Selected |
Click this button to remove any selected columns from the Selected Columns window. |
|
Add All |
Click this button to move all columns from the Available Columns window to the Selected Columns window. |
|
Remove All |
Click this button to remove all columns from the Selected Columns window. |
3. To change the order of the columns, click a column name in the Selected Columns window and drag it up or down the window. Column names are displayed from left (top columns) to right (bottom columns).
4. In the Sort by drop-down menu, select a column to determine how the grid data is sorted. By default, the data is sorted by this column in descending order. If necessary, click the Ascending check box to sort the column in ascending order.
5. To configure how many rows are displayed in each page of the grid, enter a value in the Number of Rows field.
6. Click OK to save the grid’s altered display.
